I’ve gotten quite a bit of the software done for the Client, and have a good breadboard layout. Rev5 of the PCB layout is out for processing as OSHPark, so I have a bit of time until I get those back and test the layout.
With some spare time on my hands (and the spouse watching Season 2 of Sweet Magnolias), it’s probably a good time to do two things:
- Start writing up some blog posts
- Determine the next steps for 3d modeling
A hand drawn sketch
Given the fact that I have no idea how to operate modeling software (despite my best attempts in the past), I figured a good spot to start would be to sketch out the different views on paper. Thankfully I’m literally designing a box, so even my limited artistic skills are sufficient here. And my ever trusty graph lined Moleskin provides the perfect medium for drawing boxes.
Choosing the right software
When making choices around hobbies, I feel like Reddit is always a good source of information. Just start away from the scary parts. =p The /r/3Dprinting subreddit has some great suggestions, and it seems that my best starting options are TinkerCad or Fusion 360. Fusion 360 looks a bit more complicated, but after spending an hour or two in TinkerCad, I think the more technical approach of Fusion 360 will align more closely with how I operate.
Side note: Does anyone else find it interesting that AutoDesk makes both TinkerCad and Fusion 360? I wonder how they capitalize on the two products together. I imagine there has got to be some sort of upsell motion there.
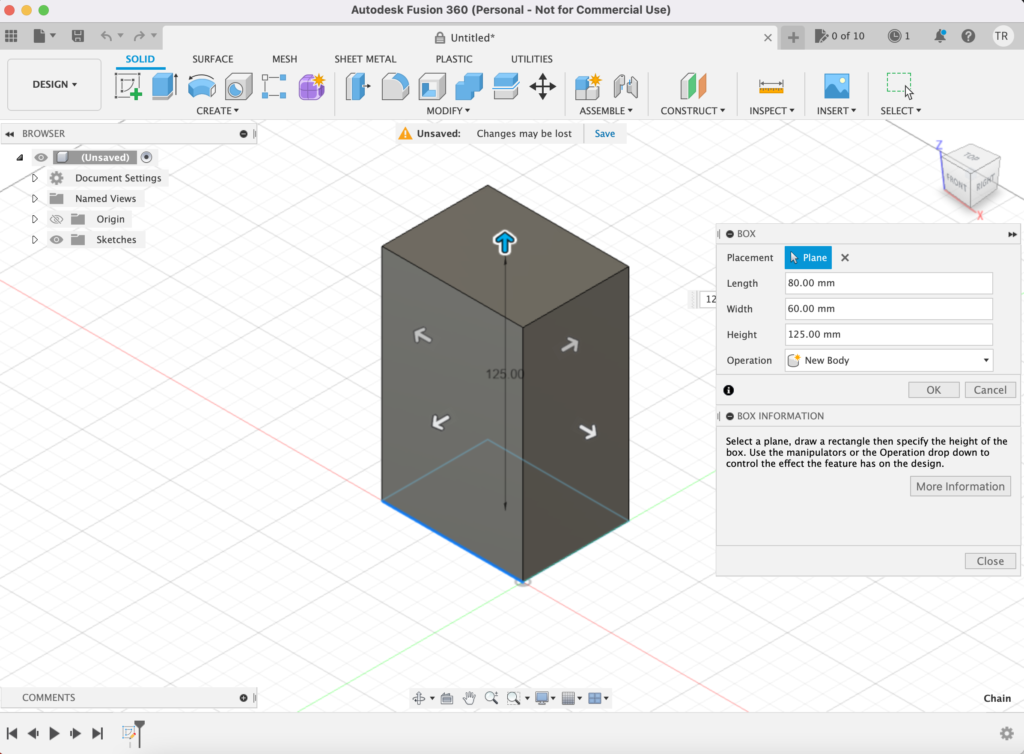
Measure twice, model once
So let’s give it a try and see where we land. First things first, let’s measure our PCB, Neopixel ring, and mounting holes to get a general idea of our cube size. Measuring size in Fritzing is a bit odd, but we can get a close enough idea.
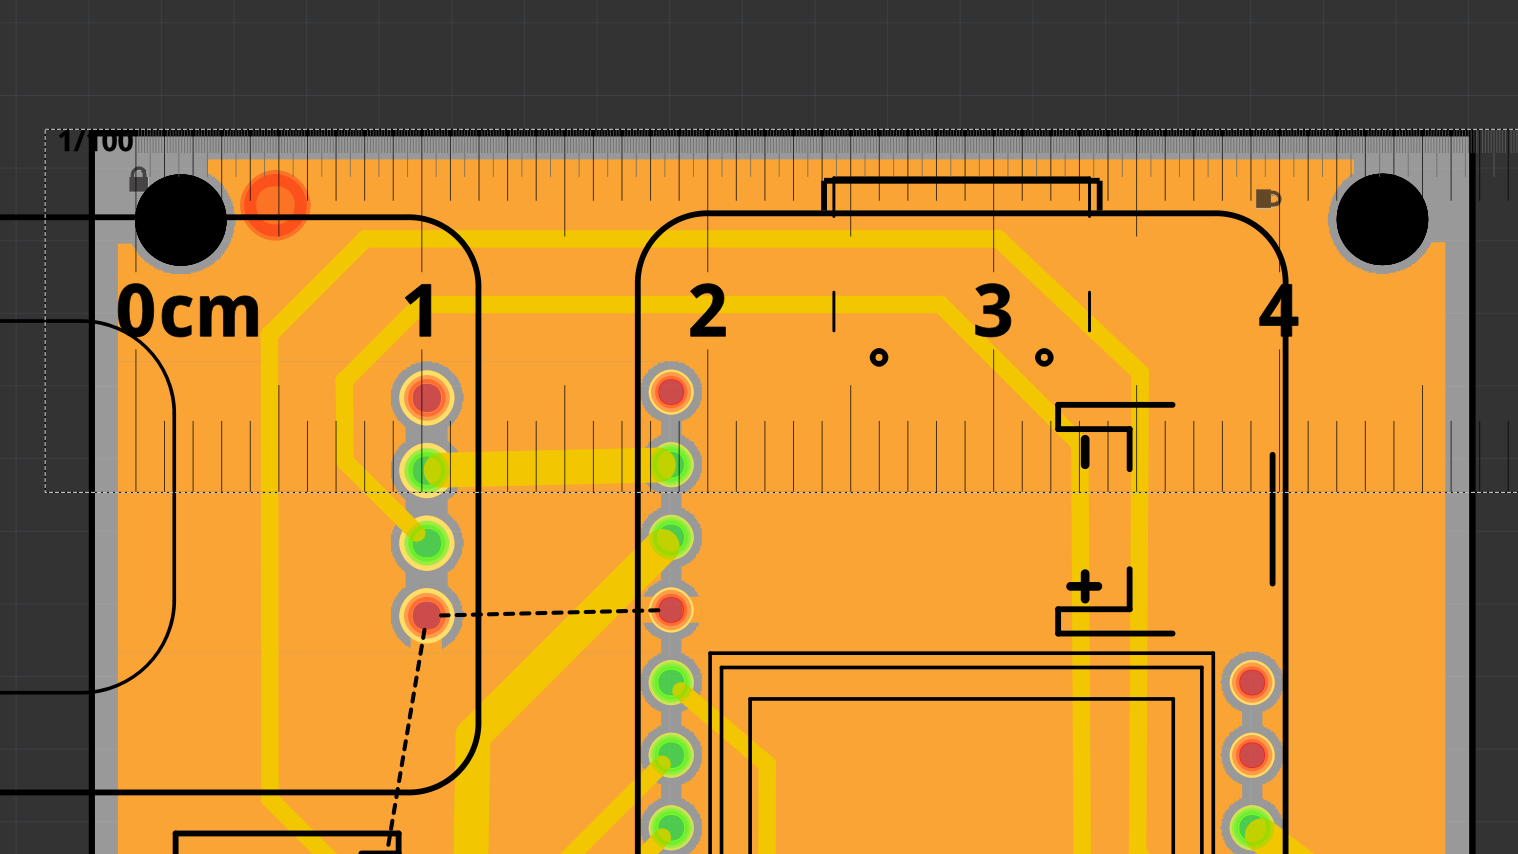
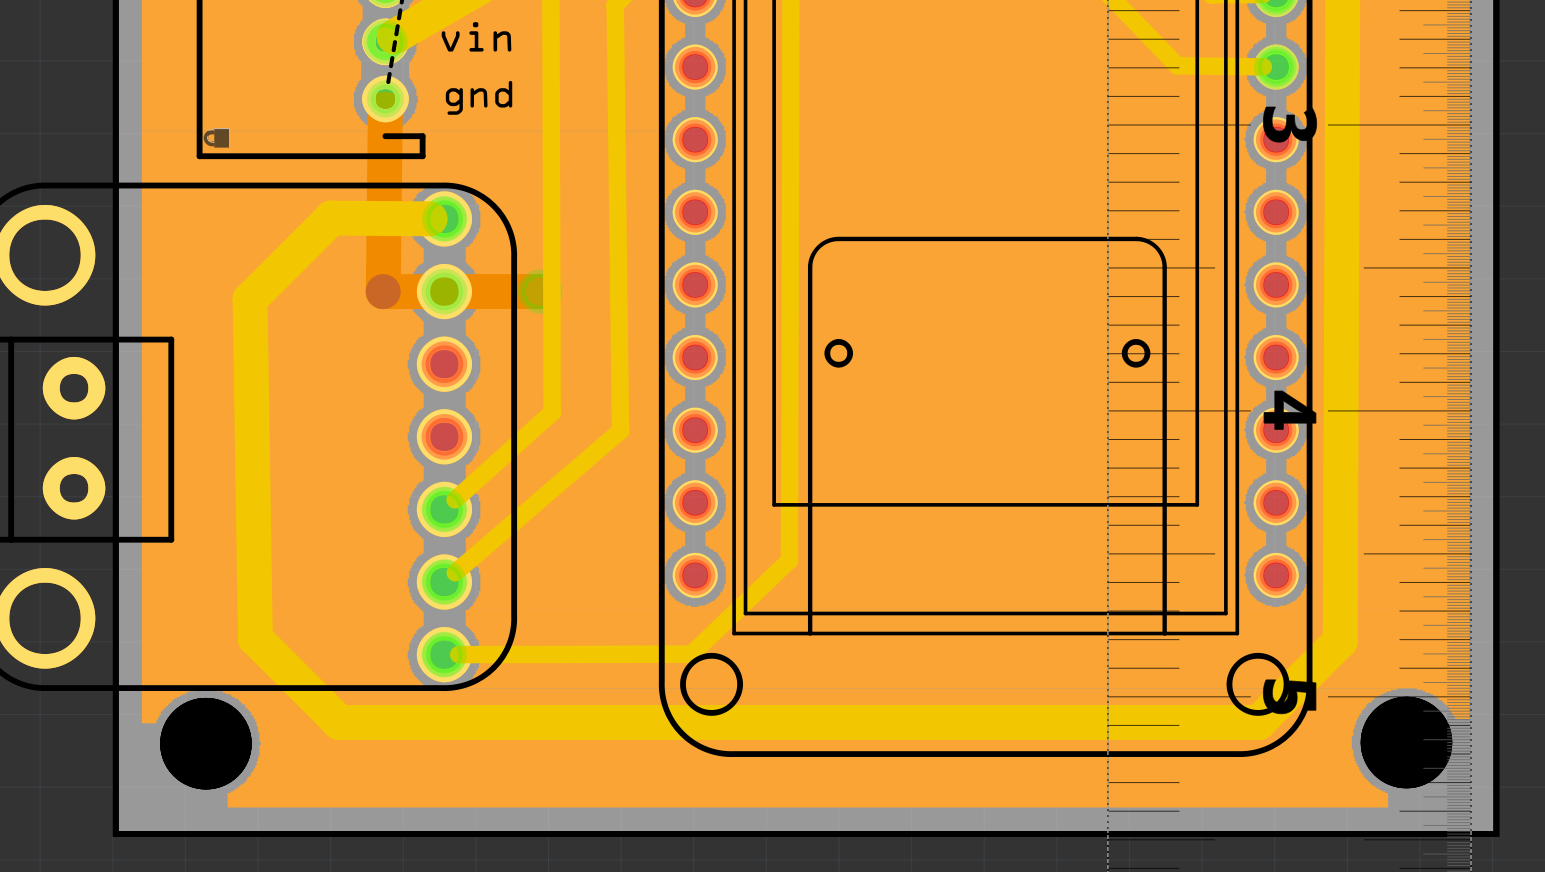
The NeoPixel ring looks to be about 65.5 mm. I’m not overly concerned with exactness, because we just want to make sure it fits inside the box. So 65.5 mm is the largest dimension we need to account for, in both the vertical and horizontal direction. We know we want a speaker under the ring, and based on the tech specs, our current one runs at 31mm.
So with 10mm padding, we’re at (10mm * 3) + 65.5 mm + 31 mm = 126.5 mm. 125mm is a nice round number that I won’t forget, so let’s start there. Width needs to be bigger than the 70mm of the speaker, so let’s do 80mm. 60mm width gives a nice aesthetic shape. That might need to change in the future, but it works for now.
Wrap Up
And unfortunately, that’s where tonight’s progress ends. A single box and some blog writing is about all that fits into an evening’s time slot. Next steps are to really dig into the modeling pieces.